Tips and tools for WordPress, Google and more
WordPress and the Twenty Twenty-Two theme (tutorial)
How to design a WordPress website with the Twenty Twenty-Two block theme and Full Site Editing (FSE): header, footer, menu, logo, colors and more.
January 25, 2022 has it all. WordPress is released in version 5.9, Code name Josephine (according to Josephine Baker), and brings the long-awaited Full Site Editing with. You can implement this new way of editing and designing header and footer areas, as well as pages, posts and archives exclusively on the basis of Gutenberg blocks with Full Site Editing (FSE) themes, such as Twenty Twenty-Two, Twenty Twenty-Three, Bricksy, Blockify, Catch-FSE and others.
The following article is aimed at people who already have experience with WordPress and possibly also with the Gutenberg Block Editor.
Table of Contents
Full Site Editing
Under Full Site Editing (FSE) is to understand that you can not only design the content of pages and posts with Gutenberg blocks, but also the Header and the Footer area, the Structure or the structure from Pages and Contributionswhich 404 error pagewhich Start page, Categories and more. Design refers to the structure, design and layout.
These are the new features of a WordPress website from version 5.9, if a block theme is used:
- StylesYou define the general design of the website (colors, fonts, spacing) and the basic design of the blocks.
- Template Editing: You edit the layout of pages and posts, archives (post lists), the 404 page, header and footer.
This now allows a website to be designed with blocks in all points and areas. If you are already used to working with Gutenberg blocks, you do not have to retrain for the design, the look & feel is retained when editing. Ready-made designs are available for pages, headers, footers and content.
First of all: the following also applies to Twenty Twenty-Three and other FSE themes.
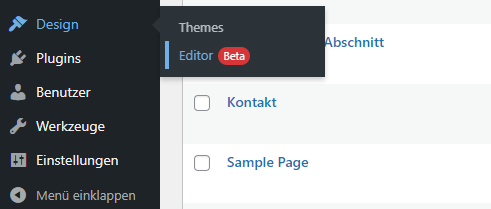
The WordPress developers have really tidied up the menu design. If you are using a block theme like Twenty Twenty-Two from WordPress 5.9 under "Design", you can (currently) only expect two slim points:
- Themes (here everything remains as usual)
- Editor (this is new)
Three editing options are offered in the "Editor":
- Website (English: Site)
- Templates
- Template parts
You can access the editor by clicking on the WordPress logo in the top left-hand corner if you are already in template or template part editing mode.

Where is the Customizer?
In a block theme, the customizer is replaced by the new Site Editor. The previous Customizer is becoming less important for block themes, so it no longer exists here. All design and layout adjustments are made in the (site) editor.
The Customizer is still available for other themes.
Note: even if you are using a full site editing theme such as Twenty Twenty-Two, you can still access the Customizer by directly calling /wp-admin/customize.php
You can then continue to enter your own CSS instructions without an additional plugin, for example.
The site editor
The site editor enables the editing of Templates and Template sharing.
If you use the site editor (Design / Editor), you will immediately be taken to the design of the pageTemplates (more on this below). You can recognize this by the dropdown at the top in the middle. The design includes the selection and composition of the header, footer and content area.
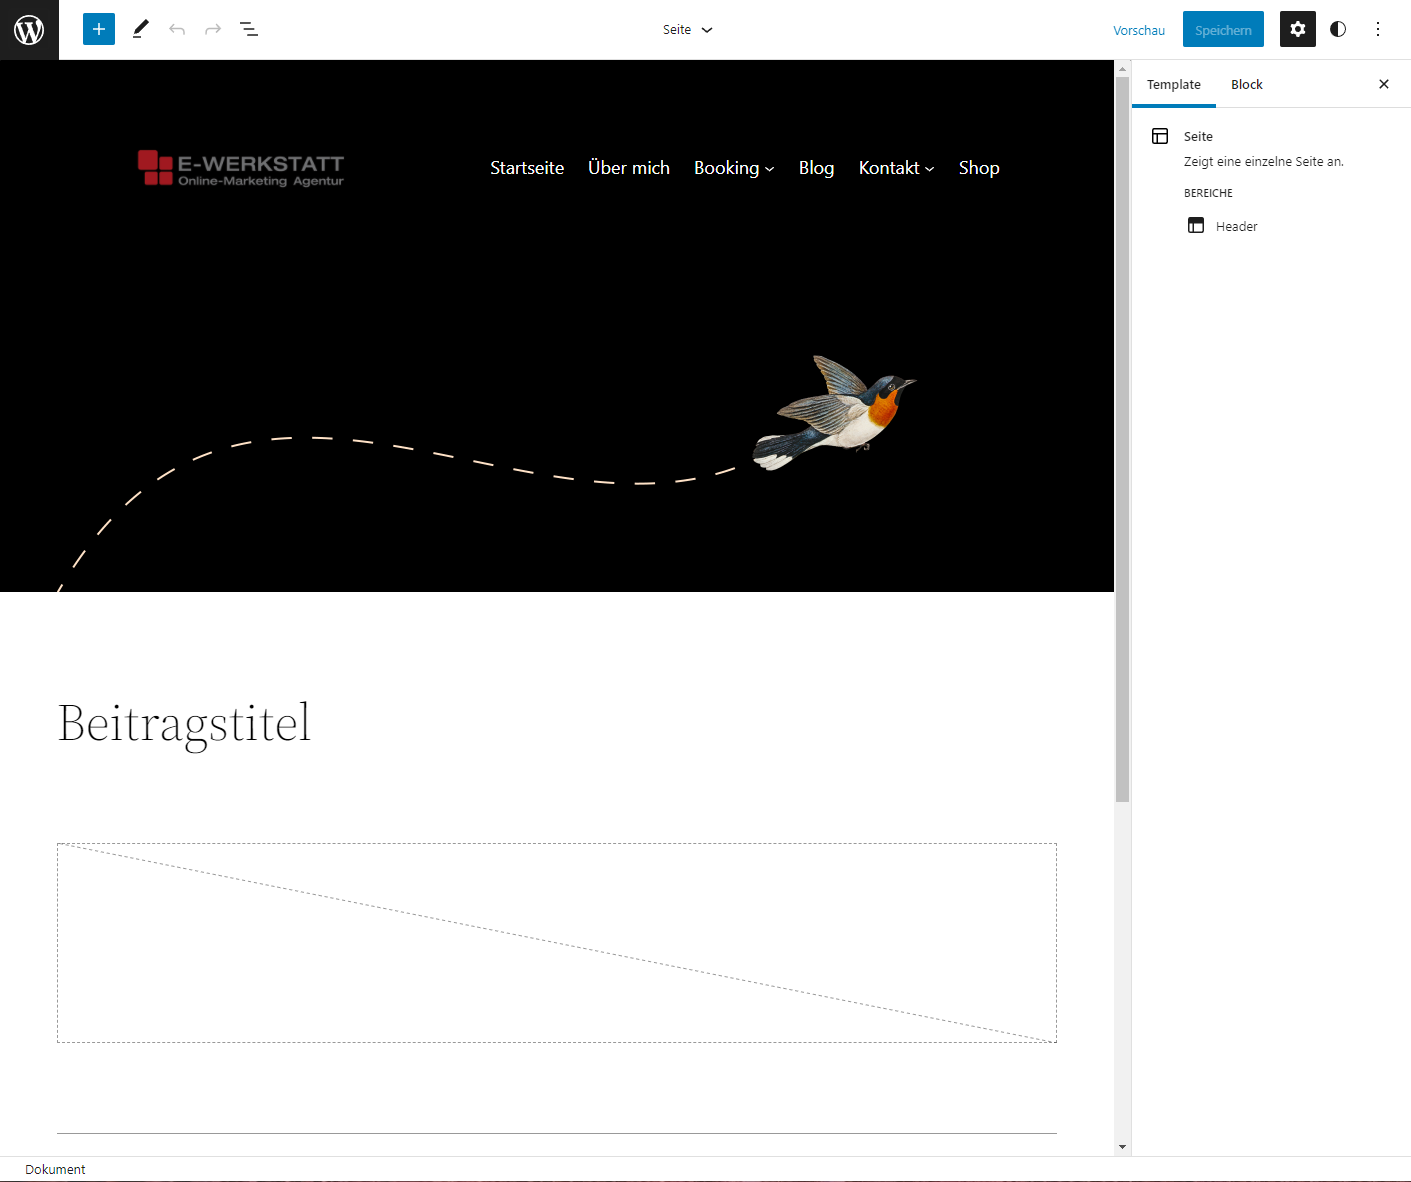
In the editor you work on Appearance of the website. The Contents You can still create your pages under the admin menu item "Pages". To do this, you must first leave the theme editor area again.
How do you return to the usual admin area? Click on the WordPress logo at the top left and then on the blue "Go to dashboard" link.
Styles
You can edit colors and fonts in the style editor. Here you can quickly customize the corresponding elements. You can also change the basic appearance of Gutenberg blocks.
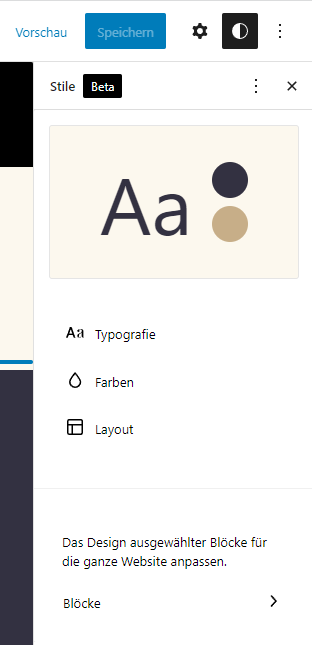
Colors
Clicking on Colors takes you to the color palettes and standard colors for various global elements on the website.
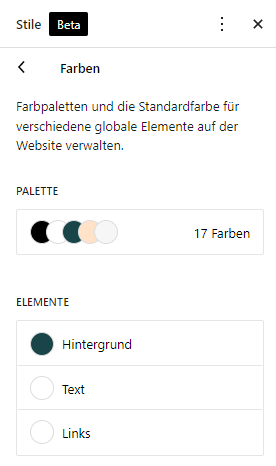
Click on the link (x Colors, here in the screenshot "17 colors") in the box Pallet and you will see the individual colors.
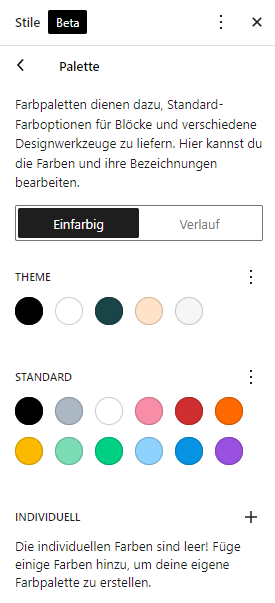
Here you can change the theme colors, but also add your own colors and give your own colors their own names.
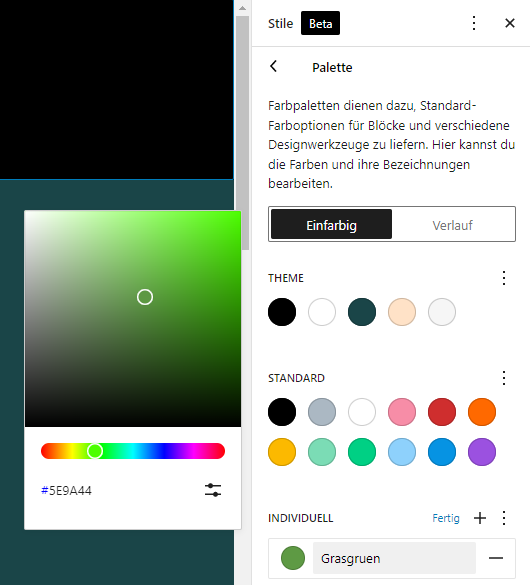
From now on, this individual color is available for your editorial work.
For DeveloperThe style information for block themes is stored in the file theme.json filed (Description in the WordPress developer manual), this file is located in the respective theme directory.
So should you ever need a Child Theme for Twenty Twenty-Two or want to create another block theme, then next to the files style.css and functions.php also the file theme.json in the directory of the child theme. This file can of course also be be created manually.
Templates and template parts
What you see on the screen as a website visitor with block themes is based on the use of Templates (templates). There are usually one or more templates for pages, posts, archives (list of posts), 404 error page, etc.
Templates
Templates can be used as predefined layouts understand. These already contain blocks and block patterns (ready-made combinations of blocks) and placeholder content.
Template parts
The templates themselves are created from Template sharing compiled. So the Template of a page the following Template parts include:
- Header
- Footer
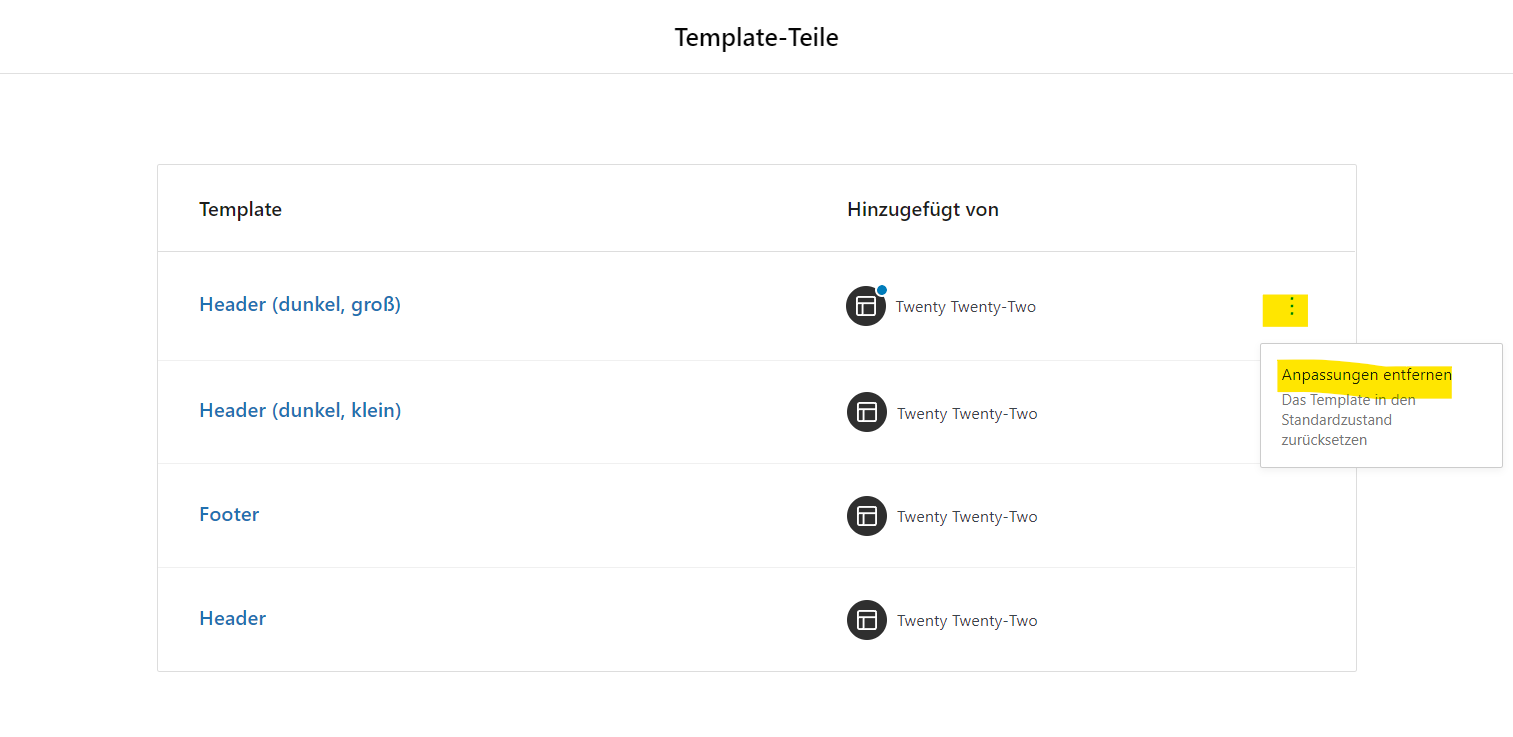
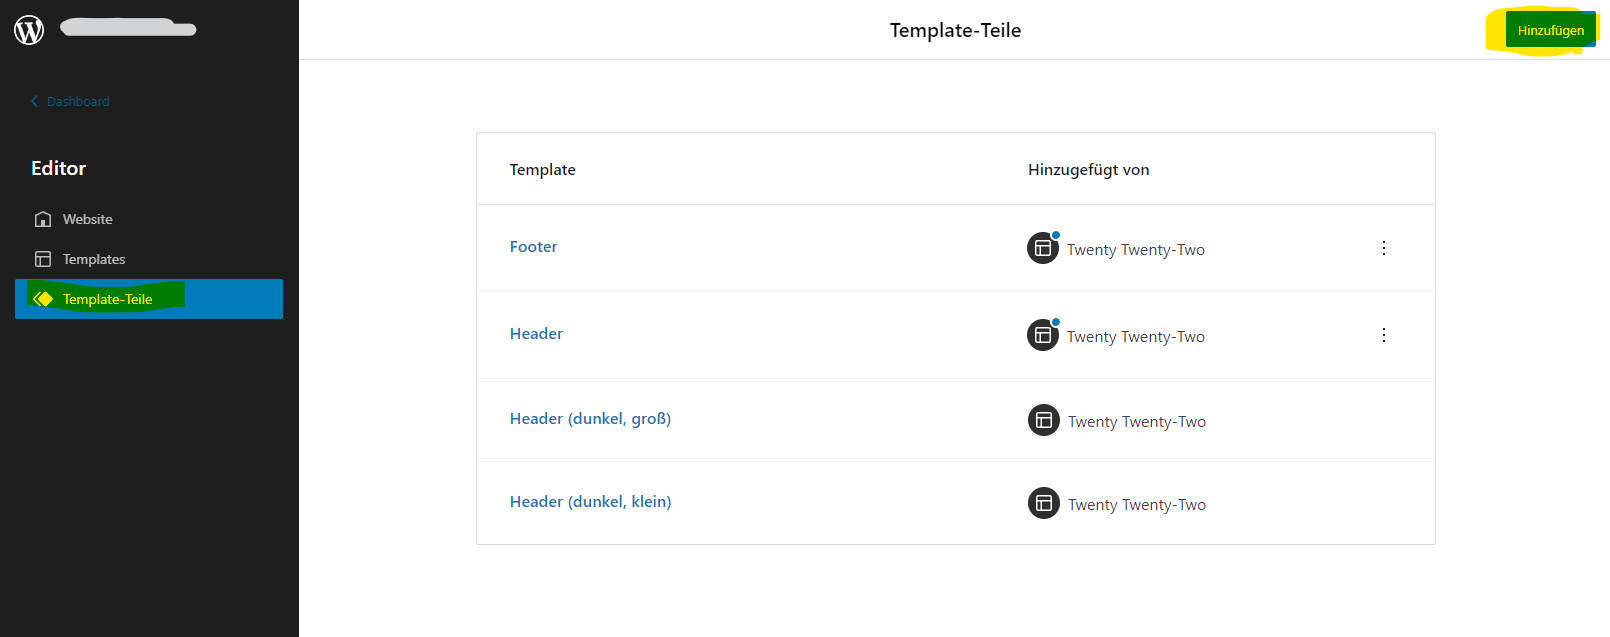
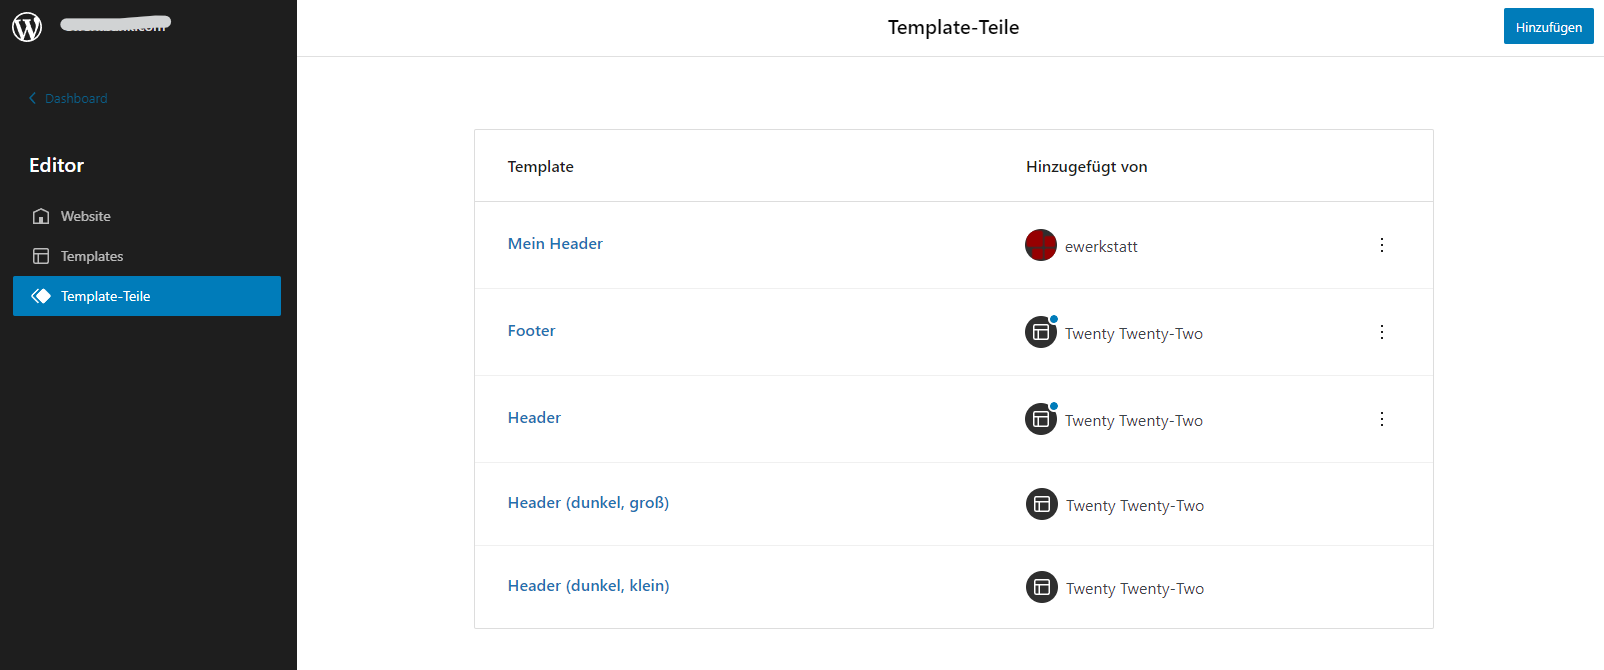
Which template parts there are and what they are called depends entirely on the block theme used. So there will probably always be a Header-template part, but it could also be called something completely different. At Theme Twenty Twenty-One you will find these template parts (status 2022-04):
- Header (dark, large)
- Header (dark, small)
- Footer
- Header
Template parts You can of course edit these templates or create new ones yourself. You can also delete template parts that you have created yourself. Changes to existing template parts can be completely reset.
Template parts So it's best to think of it as a kind of Large container which must be filled with the corresponding Gutenberg blocks and designed naturally. The Gutenberg blocks are placed in Groups summarized, these are then Small containerwhich can be used for the respective design.
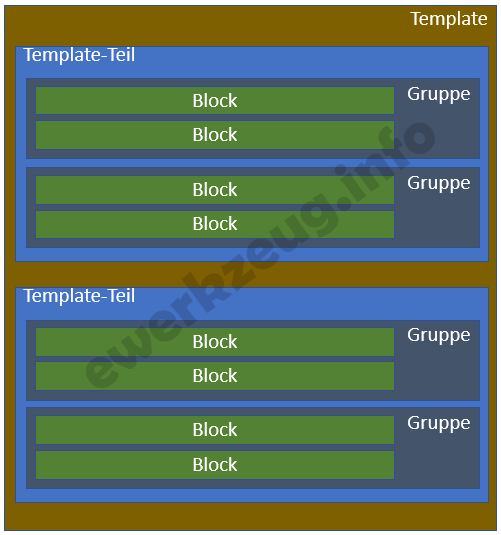
To make a comparison: On the one hand, template parts correspond to previous Widget Areasthe blocks inside the Widgets. In block themes, however, widget areas and widgets have been replaced by template parts and blocks.
Header template parts thus replace the previous design of header areas, as offered by the themes in very different ways - mostly in the Customizer.
Create new template parts
In the site editor, you can click on the blue "Add" button new template parts create. However, as of March 2022, you can only create a new site in the site editor. Home page template no other templates (please don't ask why, we would like to know why).
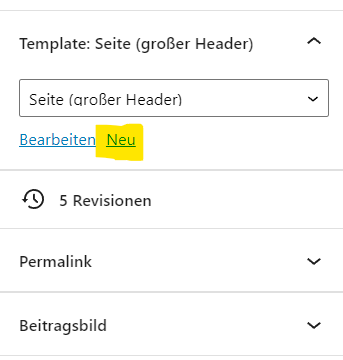
However, you can still create additional new templates (e.g. for a page with a very specific individual header or footer) directly when editing a page. To do this, open the settings of the page and then the section Template: current template. Then click on the link New.
You will now see this on the screen:
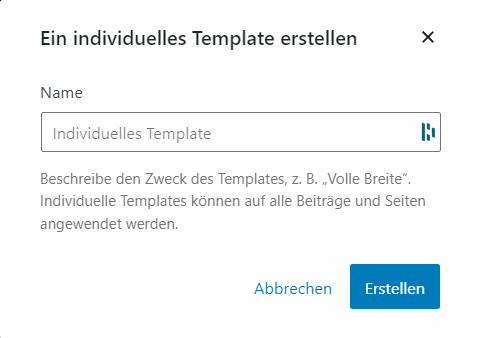
Give the template a name and click on Create you can work on the new template. You will already see a few defaults in it, which you can remove and then compile the structure of the page from existing template parts. The best way to do this is to use the helpful list view.
For Developerall information on the available templates and template parts can be found in the file theme.json. This file can also be used to create a new template. More about the anatomy of the file regarding customTemplates can be found at WordPress in the Developer manual.
Content areas
The Content areas with post title, post image, post content and post comments are not separate template parts, they are used in the corresponding templates such as Page or Individual contribution processed directly.
Where do I change the logo at Twenty Twenty-Two?
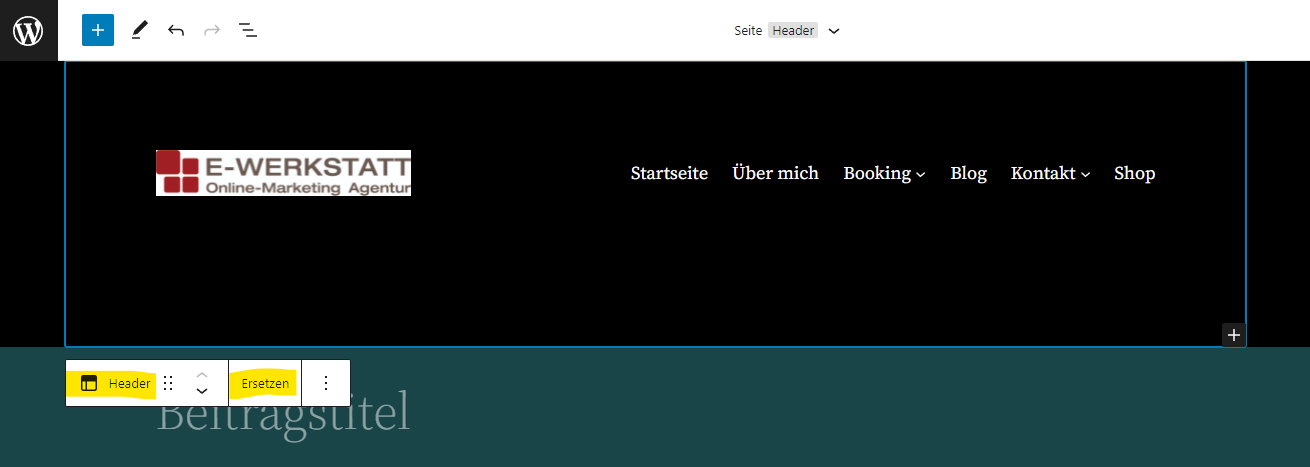
If you want to change the logo in the Theme block, go to the Editor the processing of the corresponding Template parts - in the case of the Twenty Twenty-Two theme, this is the template part Headerand open the list view there.
Then search for the "Website logo" block and replace the image (click on "Replace").
New with Gutenberg blocks
Groups
Until now, it was not easy to create sections that extend over the entire width, show a background color or a background image, and then place the content in these sections without additional Gutenberg plugins or page builders. If you want to use an additional Gutenberg plugin such as Stackable, Cadence Blocks or GenerateBlocks only the cover block remained.
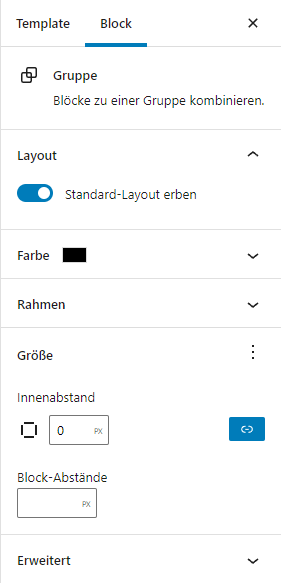
Block grouping can now be used to create such sections. Blocks can be grouped into Groups (select several blocks and click on "Group" in the three-dot context menu). The groups can now also be designed to some extent:
- Content width (for narrow and wide columns)
- Background colors and gradients (but no images or videos yet)
- Text color
- Link color
- Frame (line type, color)
- Internal clearances
This means that the groups in a block theme like Twenty Twenty-Two now roughly correspond to the Container from GenerateBlocksor the Section with a page builder like Elementor. However, with far fewer design options at present (status 2022).
Theme blocks in WordPress 5.9
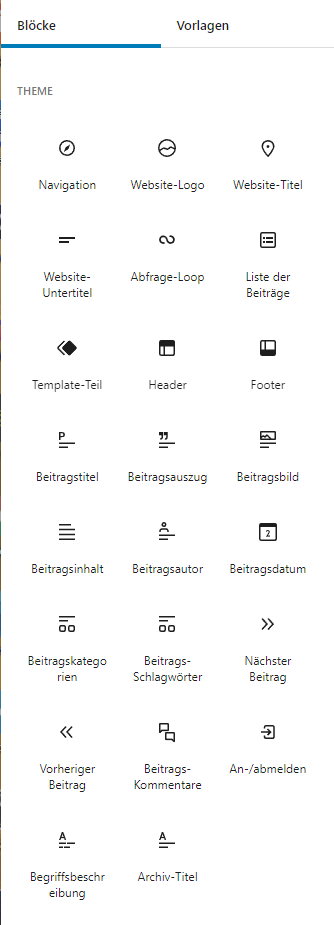
A collection of new blocks can be used website-wide, i.e. not directly related to the design of the content of pages or posts. These blocks are rather to be understood as building blocks with which the templates are created:
- Website title
- Website logo
- Navigation
- Contribution content
- Query loop
- Header
- Footer
- etc.
The theme block Contribution content is used to display the content of a page or a post. The block is therefore used in templates such as Page or Individual contribution used.
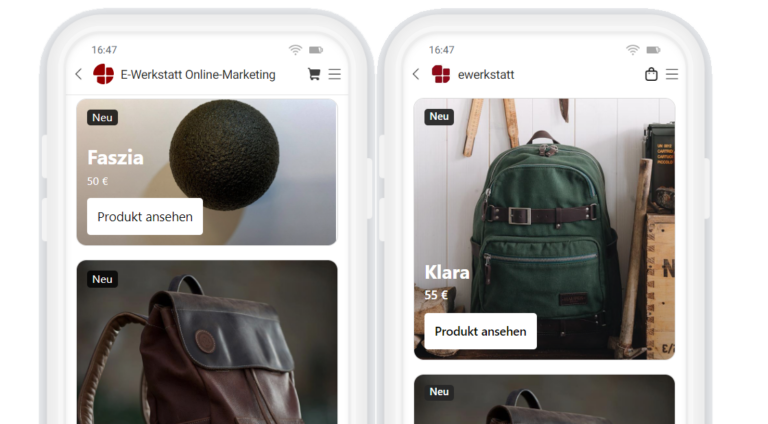
The theme block Query loop is used to display a list of posts. You can choose between different display variants:
- Carousel view
- Grid view
This block can therefore be used in templates such as Archive (category, keyword and other archives of contributions) or Search can be used.
Let's take a look at the design of a header as an example of how theme blocks are handled.
Header with full site editing
We will edit the header in the Theme block.
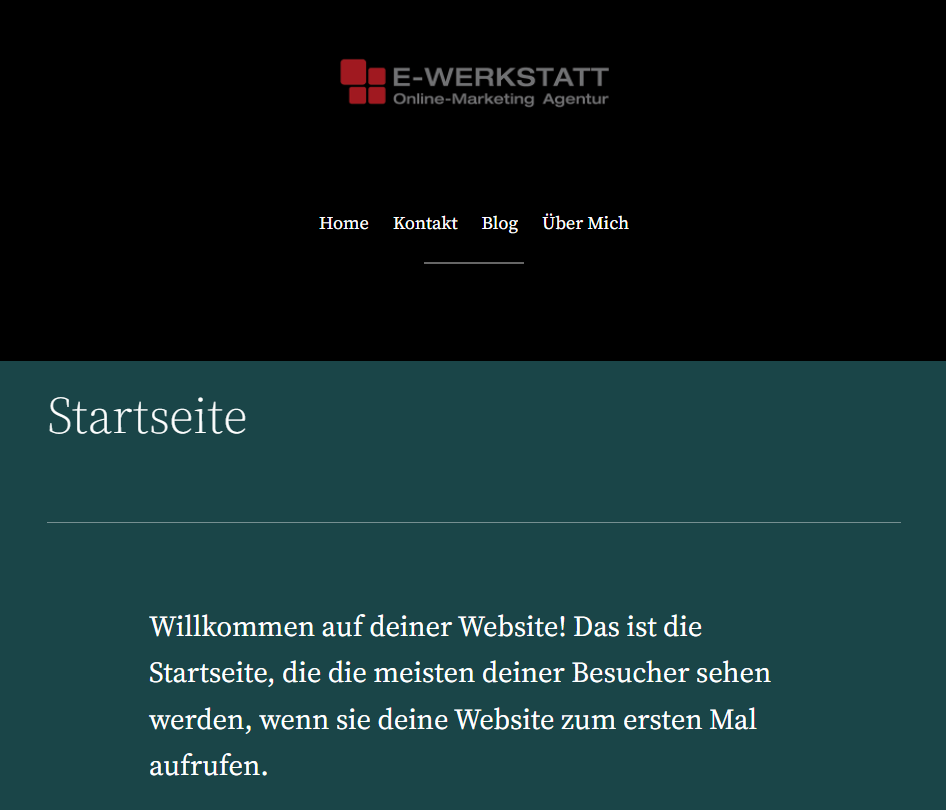
Let us assume that a new, simple header be created. The new header - let's call it My header - should contain a centrally aligned logo with a navigation menu below it. We want to place a short horizontal line ("separator") under this menu.
The new header template part is first created in the site editor in the template parts by clicking on "Add" at the top right.
Give the template part a name (in our case "My header") and select "Header" as the area.

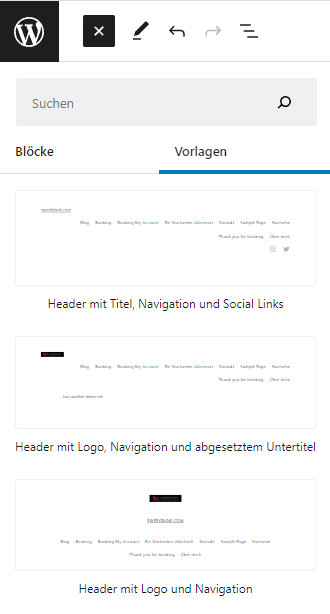
Scroll down further in the pop-up and click on "Create". You will now immediately be taken to the editing mode of the new header. Now add the Gutenberg blocks that a header requires. You will find these comparatively new blocks in the "Theme" section. The quickest way to do this is to use an existing header template as the basis for your header and customize this template.
I have opted for the template Header with logo and navigationand will change them a little.
The design
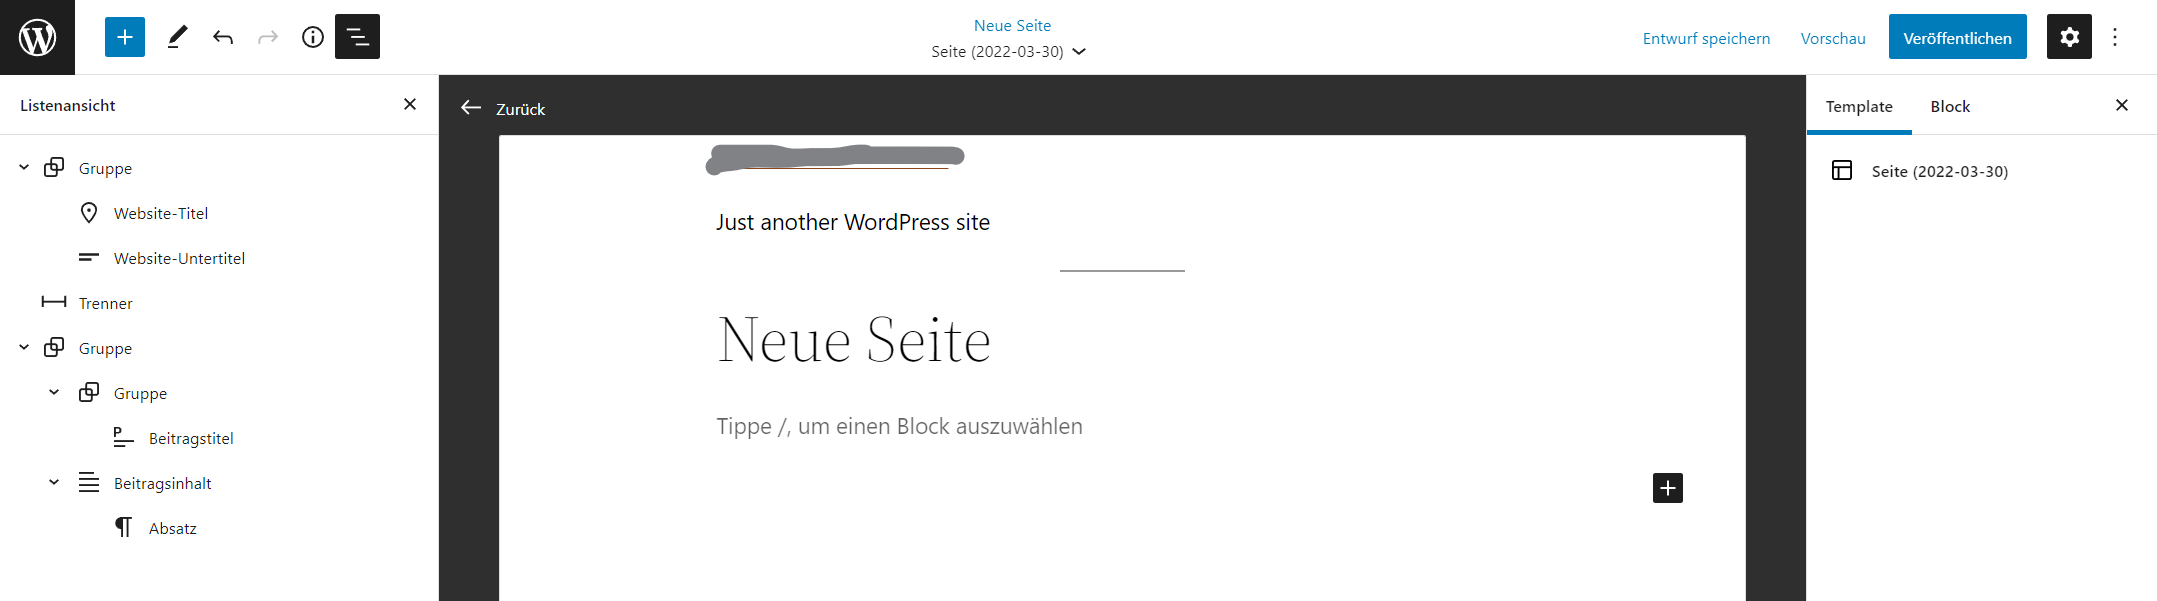
The template for our new header contains the theme blocks website logo, website title and navigation. There are also spacers and a grouping of blocks into groups.
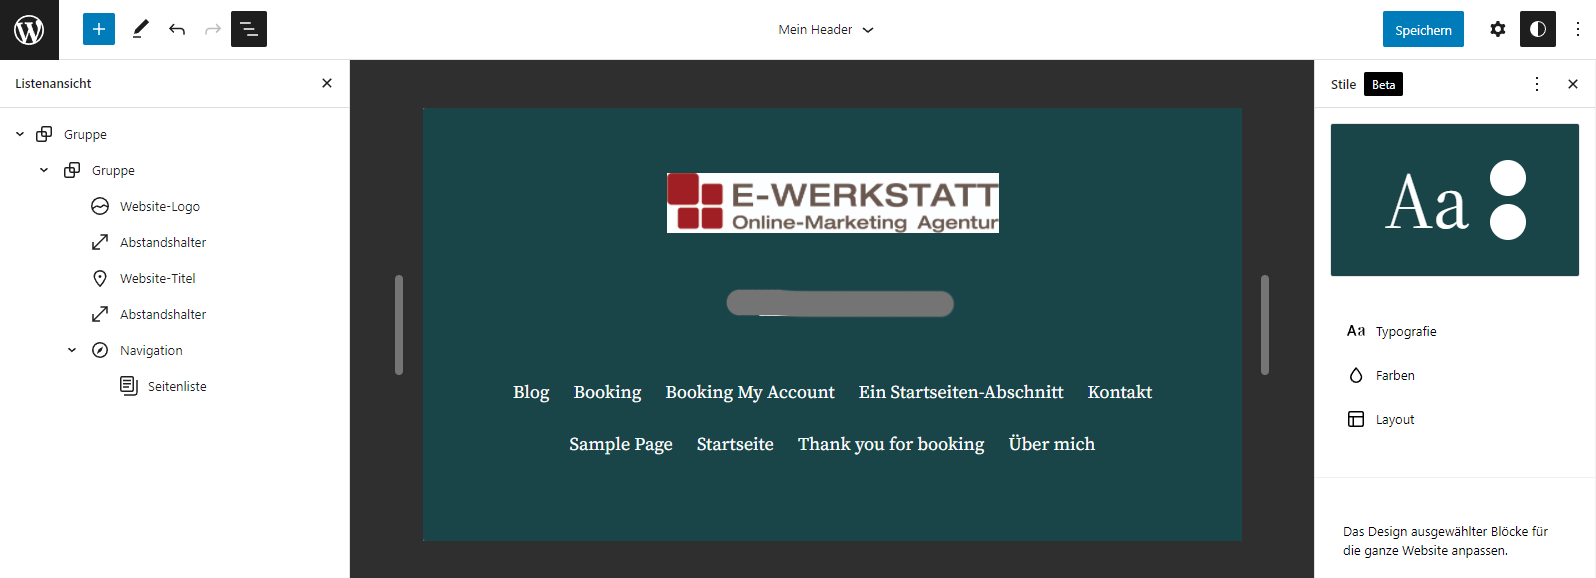
You can see it in the picture above: the List view provides an overview of the blocks used and allows them to be accessed (and moved) quickly. You can use the two sliders on the right and left of the workspace in the middle to see how your header looks at different screen widths.
If you already have a Gutenberg Editor plugin like Stackable you cannot yet use the flexible blocks of this plugin for template parts. However, the developers of Stackable are likely to follow suit quickly.
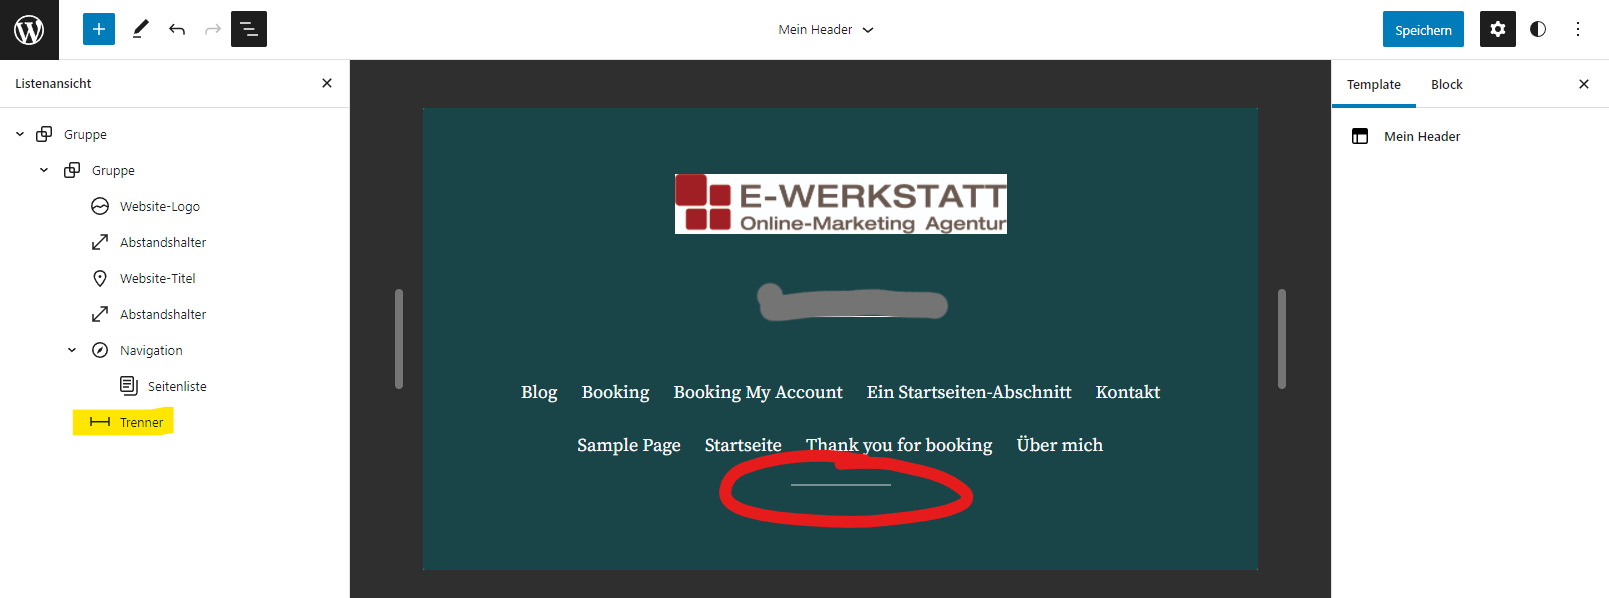
Let's add a short "separator" under the navigation. To do this, click on the plus in the blue square at the top left, search for "Divider" and drag the block into the header area under the navigation.
Would you like to change the general appearance of the website, such as the background color or fonts? Click on the new Styles Icon ![]() . The adjustments you make under Styles, affect the entire website (global elements).
. The adjustments you make under Styles, affect the entire website (global elements).
If, on the other hand, you only want to change the background color of the header, then adjust the group that contains all header elements. In the following example, I have given the outer group a black background color and used a more suitable logo variant (transparent background instead of white background).

Proceed accordingly when designing the footer template part or other template parts.
Menu / Navigation
All menu items (links to pages or blog categories in menus) are now individual blocks that can be added, expanded, moved or removed (Explanatory video in English).
Make a decision at this point and choose one of the following three alternative procedures.
- You can either work on the existing Page list (this is certainly an advantage for existing pages), then this page list is first converted into an editable list of links. Now you can move and customize the individual menu items in the form of small Gutenberg blocks.
- Or you can select an existing classic menuwhich is then also converted into a block-based menu. Only then can you treat the individual menu items as small movable blocks.
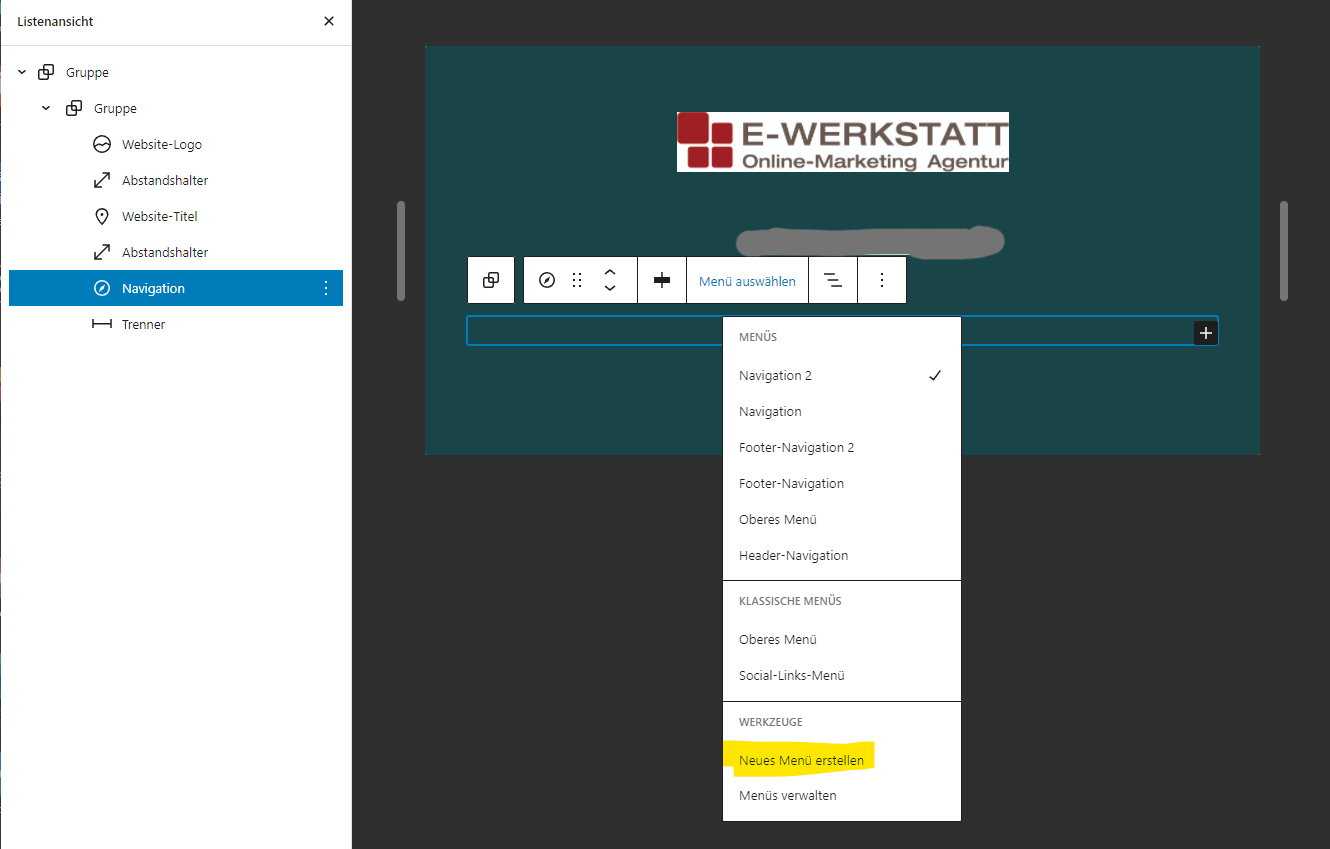
- Or you can now create a New menu and fill it with the desired menu items one after the other.
I do this now and first remove the existing page list. The quickest way to do this is in the list view on the left (you can also add the page list again at any time). Then I select "Create new menu" in the context menu of the navigation block and in the second step "Start empty".
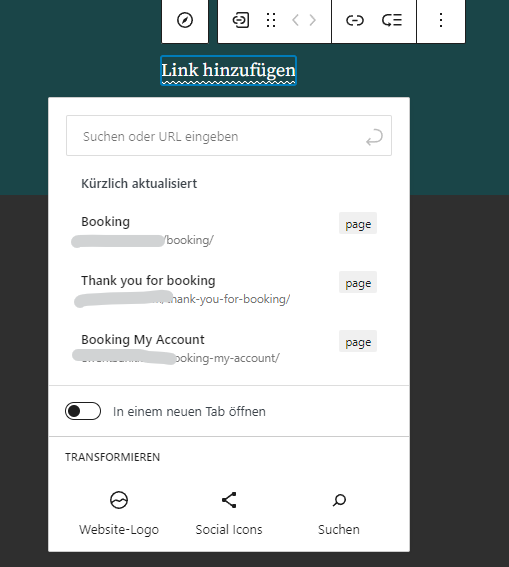
Click on the plus on the black background on the right to add a new menu item. You should know the page title or blog category and now enter the first three letters of the title. Suggestions of found pages or categories will follow.
Menu items that have already been set can be moved right/left and thus repositioned.

You need Subitems? Then click on the corresponding symbol next to the actively selected menu item and add the sub-items there. The color scheme of the sub-items is exactly the same as the color scheme of the menu under Styles (![]() ).
).

Finished? Then click on Save in the top right-hand corner so that you can use your new template part.
Now click on the WordPress logo in the top left-hand corner to return to the editor.
The new header template part should now be used in your page template. Select under Templates "Page" button. You use this to edit the ready-made page design from Twenty Twenty-Two. However, you can of course create your own page template in the same way as your own header and save it under your own template part name (e.g. "My page"). We will spare you that in these instructions.
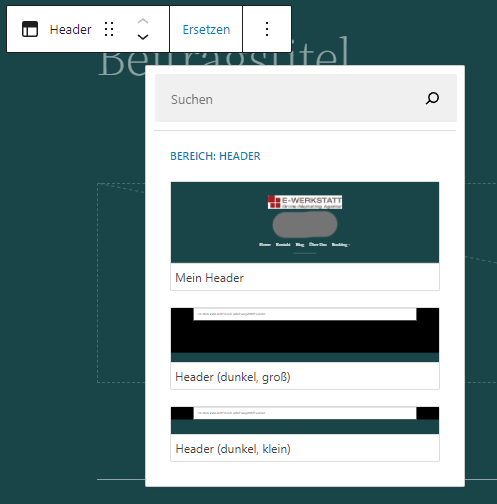
Select the "Header" block and click on "Replace".
Select your own header "My header". You will see it in the preview of the available header template parts.
Now save the page design (blue "Save" button at the top right) and view a page of the website.
Would you like to edit or delete your "My header" template part later? Then go to the list of template parts in the Theme Editor. To edit, click on the name, to delete click on the three vertical dots.
If you have changed one of the standard template parts (footer, header), you can restore its basic settings. To do this, also use the three vertical dots in the corresponding line.
With other block themes, you will also find other template parts here, which are supplied by the theme developers.
Pattern ("block templates")
You may already be wondering why there are still different FSE themes if the way they work is always the same. The difference lies mainly in:
- the prepared design of the header and footer,
- the offer of templates,
- the range of styles (combinations of colors and fonts),
- the different templates and standard template parts.
Since August 2021 (with WordPress 5.8), a Directory at wordpress.org can be used via so-called patterns ("block templates"). These are ready-made Combinations of blocks for entire pages or parts of pages and posts that can be copied and pasted. It could hardly be simpler.
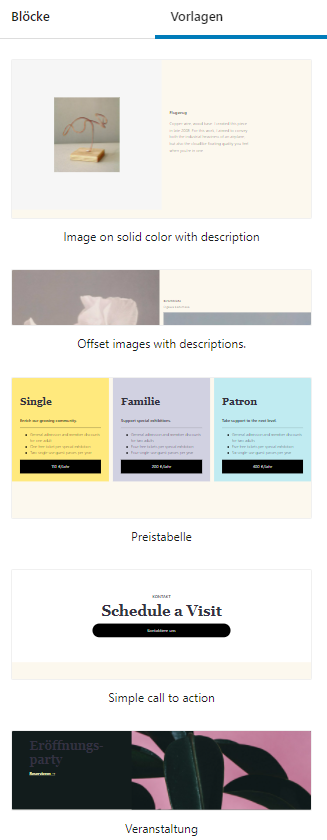
FSE themes now also provide their own block templates for content use, matching the design of the theme and its intended use. You can add these templates when editing a page or a post in the following way:
- Click on the + icon in the top left-hand corner of the page editor to add a block.
- Click on the Templates tab.
- Find the desired template (use the "Explore" button) and either click on it to insert it at the cursor position or drag the template to the desired position.

This means that WordPress finally offers what has long been available with page builders such as Elementor or website systems such as Square Space. However, the WordPress user community can contribute with self-made templates.
Here are some examples of templates that use the FSE theme Alara offers.
Conclusion
If exact specifications have to be achieved, then this is still a job for web designers and creators. This probably also includes the creation of template parts for block themes. The new approach still seems very unfamiliar.
But for people who have already been working with Gutenberg blocks, working on the basic design will be easier if it is mainly just about colors, fonts and rough placements. There are templates for the various template parts to help you put together the structure and appearance of your own website. This makes the Twenty Twenty-Two theme the most flexible and customizable standard WordPress theme to date.
If we compare the options for designing the header and footer area in Twenty Twenty-Two with those of "conventional" themes such as Blocksy we realize that there is still no way around Blocksy. This could change sooner or later. On the one hand, the advanced blocks of plugins such as Stackable or Cadence Blocks on the other hand, the Groups-blocks can soon be designed even more flexibly.
On the other hand, it is very easy to use the many templates (patterns) that are already available to quickly achieve attractive results in the content area.
Those who understand English can Online course provided by the WordPress team. The course goes into detail on full site editing, block themes, website design and block templates.
The website https://fullsiteediting.com/ shows one possibility of implementation, here of course you use a block theme with WordPress 5.9 yourself.
Stay tuned, this article will be continuously expanded and improved (is that even possible, honestly now?). Write us your suggestions as a comment.
Would you like to be informed quickly about new articles and more?
Then we recommend that you subscribe to our newsletter "Online Marketing News from E-Werkstatt".


Hello,
I would like to use WP 6.0 with the Twent Twenty-Two theme. But I have a problem: I don't want to have the two pages "Imprint" and "Privacy Policy" in the menu at the top, but only in the footer. It must be possible somehow, as it is on your site. But I can't find the right way to get it that way.
When I create an "Imprint" page, it is automatically at the top of the main menu. I could insert a paragraph in the footer with the single text "Imprint" and link this text to the page "Imprint". But the "Imprint" page still remains in the top main menu. How do I get the page out of there?
I would be grateful for any tips.
Hello Roman,
To do this, simply create 2 menus. Example names: "top-navigation", "bottom-navigation"
Then you only enter what you want in the two menus and assign the two menus to sensible positions in the theme, or in full-site editing you can add or remove links to pages or categories. See also https://www.ewerkzeug.info/wordpress-5-9-und-twenty-twentytwo/#menue-navigation. You can remove all links in the menu with the three-dot menu or with Shift+Alt+Z. Make sure you get the right block!
I assume that you do not have a defined menu in your header template part, but only the page list.
I hope this helps you.
PS: this website uses the Blocksy theme.
Hello,
I built my 2022 theme in an appealing way, but screwed it up algorithmically:
When I call up a category, the last post of this category appears, but with the heading of the very last post (of another category) and the following posts are then also the 2nd and 3rd and nth last posts of another category.
Where can I look to eliminate this error?
Greetings, CM
Hello,
You can reset changed original templates. To do this, click on the three-dot menu on the far right of the template and click "Reset to default state".
Alternatively, you can edit this template (index? archive?) and use the list view to see the structure better.
Kind regards
Heinz